
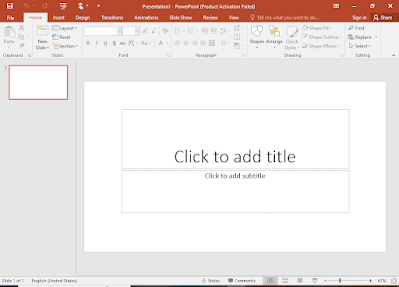
What is power point?
Powerpoint is an application software developed by Microsoft office based on digital presentation, by powerpoint we can animate any object or text inserted in the slide.”powepnt” is the command name of power point. पावरपॉइंट डिजिटल प्रेजेंटेशन के आधार पर माइक्रोसॉफ्ट ऑफिस द्वारा विकसित एक एप्लीकेशन सॉफ्टवेयर है, पावरपॉइंट द्वारा हम स्लाइड में डाली गई किसी भी वस्तु या टेक्स्ट को एनिमेट कर सकते हैं। powerpnt" पावर प्वाइंट का कमांड नाम है
Home Tab
1. Clipboard Group
- Cut =ctrl+X → By this option we can change the position of Selected text or an object.
- Copy=ctrl+C → By this option we can create a duplicate of Selected text or an object.
- Paste=ctrl+V → By this option we can display out the Cut or copied Text or object.
- Format Painter = ctrl+Shift+C → This option copy the format of selected text such as color effect, style effect, size effect etc and apply at another text.
2. Slides Group
- New Slide(ctrl+m) → By this option we can insert a new slide in the presentation, slide means the working area.
- Layout → by this option we can insert a text holders box in the presentation which decide the slide structure.
- Reset → This option reset the layout of text holders box.
- Section – By this option we can create a new group category for the selected slide.
3. Font Group
a. Font – This tool can change the writing style or language.b. Font Size – By this option we can adjust (Increase or Decrease) Selected text size.
c. Bold → This tool make thicker the selected text.
d. Italic → By this option we can make curve the selected text.
e. Underline → By this option we can draw a line under the selected text.
f. Text Shadow → This tool add the shadow effect for the selected text.
g. Strike though → By this tool we can make the selected text as the false text by add the cross line at the center or the the text.
h. Character Spacing → This tool can adjust the character spacing between the text.
i. Font color → By this option we can change the selected text color.
j. Change Case → This option change the text as sentence case, upper case, Lower case, and toggle case,
k. Grow font → By this option we can Increase the text size.
l. Shrink font → By this option we can Decrease the Text size.
m. Clear formatting → This tool can remove all effect from the text such as color effect, font effect, size etc.
4-Paragraph Group
a. Bullets → By this option we can add the dot(.) Symbol at each first line.b. Numbering → By this option we can add the number series for the each line.
c. Decreasing Indent→ By this option we can Decrease the Line level.
d. Increase Indent → By this option we can Increase the line level.
e. Line spacing →By this option we can adjust the spacing between the written lines.
f. Text Direction →By this option we can change the writing text angle.
g. Convert to smart Graphic → This option can add relational shape in the slide.
h. Align Left →This option allows the cursor from the left direction of the slide.
i. Align Center →This option allows the cursor from the center direction of the slide.
j. Align Right →This option allows the cursor from the Right direction of the slide.
k. Justify →This option adjust the all text as equal written in the slide.
l. Add or remove columns → This option add multiple text column which can divide the single columns paragraph into the multiple columns.
5. Drawing Group
a. Shape →This option can insert multiple types of shape in the slide.
b. Arrange →By this option we can adjust the inserted shapes position such as bring forward, send backward etc.
c. Quick Style → This option change the shape style such as effect, color, outline effect etc by one click.
d. Shapes fill → By this option we can change the inserted shapes color.
e. Shape outline → By this option we can organize the shape outline such as thickness, color, effect etc.
f. Shape effects → This option change only the darkness and the lightness effect for the inserted shapes.
6. Editing Group
a. Find → if we need search any specific text written in the slide, find option helps us to find them.
b. Replace → By this option we can put an another word at place of the other word.
c. Select → By this option we can select all word or the inserted shapes
Insert Tab
1. -Slide Group
a. New Slide → By this option we can insert a new blank slide in the power point presentation2. Table Group
b. Insert Table → This option insert a table having row and columns margins.c. Draw Table → This option draw only single column in the power point slide.
d. Excel Spread Sheet → This option insert the Excel spread sheet overt the power point presentation.
3. Images Group
a. Picture → By this option we can insert the insert an image from our computer’s file in the power point slide.b. Online Picture → By this option we can insert an image using internet.
c. Screenshot → This option can take a screenshot behind the window of current opened power point.
d. Photo Album → This option give us a photo album experience by collecting multiple photo from our computer folders.
4. Illustrations Group
a. Shapes → By this option we can insert the different type of shapes in the slide.b. Smart Art → This option insert the relational shapes in the document.
c. Charts → This option show the numbers value in the form or graph.
5. Links Group
a. Hyperlinks → By this option we can insert the any website link in our slide content or can also link one slide to another slide.
b. Action → By this option we can link a file address presented in our computer
6. Comments Groups
Note- By this Group we can add short note about in selected content.7. Text Group
a. Text → By this option we can a text holder box in the slide.b. Header & Footer → This option can add header content and footer content such as page number.
c. Word Art → It is also add text holder box but it have styles text format.
d. Date & Time → By this option we can add current date and time in the slide.
e. Slide number → This option add series number for each slide.
f. Object → By this option we can open any installed application over the power point present and insert their data in the presentation directly.
8. Symbol Group
a. Equation → By this option we can add mathematic formula sample in the slide.b. Symbol → By this option we can add mathematic and other symbol in the slide.
Design Tab
1. Themes Group → By this Group we can Set the overall slide design2. Variants → This group set or change the current Design themes.
3. Customize Group
a. Slide Size- By this option we can set the Slide size.b. Format Background- By this option we can Set the Background style such as background-color, Background effect, Background image etc.
Transition Tab
1. Preview Group →This Group Set the presentation view before the saving the Document.2. Transition to this slide
a. Transition Effects → By this option we can set the First look of Presentation slide.b. Effect Options → By this option we can set the darkness and lightness effect of presentation.
3. Timing Group → By this option we can set the slide presentation time gaping.
Animation Tab
1. Animation Group – By this group we can set the different type of animation at any object or text.2. Advanced Animation Group- This group also set the animation at any object.
3. Timing Group- By this option we can set the timing gap between two animations.
Slide Show Tab
1. Start Slide Show Group
a. From Beginning → By this option we can start Presentation From First Slide.b. From current slide → This option start present presentation from the current slide.
c. Present Online → This option allow us to present our slide using internet at another server.
d. Custom Slide → by this option we can set custom slide presentation view.
2. Set up Group
Note – By this option we can set up some setting such as, slide narration timing, spending time for each slide.3.Monitors Group
Note- → By Monitors Group We can set up the Presentation Resolution for slide show.Review Tab
1. Proofing Group
a. Spelling and Grammar(f7) → By this option we can check the spelling and grammar mistake in the slide.b. Thesaurus → By this option we can check the synonyms and antonyms for the Selected Text.
2. Language Group
a. Translate → this option translate the selected text in any language.b. Language → This option set the default translation language.
3. Comments Group
a. New Comment → by this option we can set write a short note for the selected text.b. Delete → This option delete the inserted comment.
c. Previous → This option show the one last inserted comment.
d. Next → This option show the one forward inserted comment.
e. Show Comments → This option show all inserted comment link.
4. Compare Group
a. Compare/Combine → By this option we can open two ppt file at one time on the screen and compare or combine them to each other.b. Accept → By this option we can Accept the modified content and include them in the real document.
c. Reject → by this option we can Reject the modified content and remove them from the real document.
d. Previous → this option show last compared content.
e. Next → This option show the next compared content.
f. Reviewing Pane → This option collect some special data such as detail about inserted image, shapes etc and also hide them directly.
g. End Preview → this option remove the preview window and show the work area.
View Tab
1. Presentation View GroupNote- all option presented in the view tab are used to show our presentation in different view.
a. Normal → this view is the default presentation view in which our slide show normally.
b. Outline View → In this view all opened slide’s thumbnails show smaller and slide layout show broadly in the window.
c. Slide Sorter → with the help of slide sorter view we can easily sort our slide its mean we can easily change the slide position number by selecting and dragging slide.
d. Notes Page → In this view we can write a note about current slide its show our slide note as bigger than past by which we can easily write our notes.
e. Reading View → In this view we can only watch our slide as reading mode we can’t edit them in reading mode.
2. Master Views
a. Slide Master → by slide master we can control our all inserted slide effect such as color, effect etc.b. Handout Master → It decided how our presentation will print out and how it look like when we will print them.
c. Notes Master → In the slide button there are also a blank area in which we can write our content or a short note, this view control how notes will be printed and how it will be look when we will print them.
3. Show Group
a. Ruler → There are two default ruler found in the slide page which decide the cursor position.b. Gridlines →Gridline are made from to line row and column which help us to draw any shapes perfectly.
c. Guides → Guide are four line which indicate the center of the slide.
4. Zoom Group
a. Zoom → by this zoom we can increase or decrease the slide zooming view.b. Fit to window → This option set the slide zooming view percentage at the 100% by one click.
5. Color/Grayscale Group
a. Color → By this view we can watch our slide in color view.b. Grayscale → this option show our presentation in the form of Grayscale.
c. Black and White → This option show our presentation in the for black and white.
6. Window Group
a. New Window → By this option we can take new window.b. Arrange All → this option display all opened window on one screen at one screen.
c. Cascade → This option show all window as cascade position.
d. Move split → by this option we can break our slide into two window at the position of cursor.
e. Switch Windows → This option can show any opened window on the screen.